Who's Got the Button?


Can't find buttons for that special doll? Make your own! Here's a collection of ideas for making your own buttons.


Ribbon
& Trim
These
are based on decorative buttons used for human-size clothing. Spectacular
on a doll!
 |
Knot Button: Use cording, ribbon, silk thread, or embroidery floss to make a figure-8 knot (top). Tighten the knot (second picture) and draw the cord ends together. Roll the knot between your fingers to make it round and even. Thread cord ends into a needle and draw through fabric to attach button to clothing (third picture). For heavy cording, glue loose cord to bottom of knot. When glue dries, trim off excess cord and sew or glue button in place (fourth picture). Combine two cords for variety (bottom). |
| Frog: Start with the knot button above, leaving cord ends long. Form three even loops. Hide and glue cord ends underneath center of loops. Make a second piece with three even loops, and one long loop (no knot). Sew or glue the two pieces opposite each other so the knot buttons into the long loop. |  |
 |
Straight Frog: Start with the knot button above, leaving cord ends long. Sew the knot where you want it on the garment. Thread each cord end into a needle, and "stitch" into fabric to hide the end. Repeat, leaving just a long loop where the knot is on the first piece. |
| Spiral Frog: Start with the knot button above, leaving cord ends about an inch long. Roll up the cord ends to about 1/4" shy of the knot (this will vary with the size of the doll), making a flat spiral. Glue the spiral together. Repeat for the other cord, coiling in the opposite direction, and leaving just a long loop where the knot is on the first piece. Sew or glue the two pieces opposite each other so the knot buttons into the long loop. |  |
 |
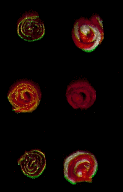
Spiral: Use flat trim or ribbon (the three on the left), or silk thread or embroidery floss (on the right). Spread glue on one side of a 1/4" wide ribbon or trim. Roll into a tight coil. Let glue dry, then slice coil in half, making two 1/8" thick coil buttons. Optional: use two colors of trim or ribbon. Glue one side of each, place flat together, then roll up. These buttons can be sewn or glued to a garment. |
|
|
|
 |
Punch
out disks using a hole punch the size (and shape!) of the button you want. For some
materials, you'll get a cleaner cut if you punch two layers at a time.
Heat and flatten the Friendly Plastic before punching for a more realistic
thickness. Use a glue stick to attach thin plastic buttons to scrap paper,
then paint with nail polish and let dry before making holes in buttons.
Use a pin or needle to make holes in each button.
Variation: Punch out two thin disks of the same size. Punch a smaller hole in one and place it on top of the other to make a raised edge. Paint them both the same or two different colors. |
|
|
 |
|
Here are techniques you can use with polyform clays (like Sculpey and Fimo), paper clay, even ceramic clay. These can be sewn or glued on; if you glue them, stitch through the holes first, so they look sewn on. |
|
| Balls: Make tiny balls of clay. Flatten each ball with a finger or use a skinny dowel and flatten just the center of the ball, so you get a flat button with a raised edge. Continue at * , below. | |
| Extrusion: Load clay in an extrusion tool (like Kemper's Klay gun). Slice off disks as you extrude the log. Continue at * , below. | |
| Cookie Cutters: Marsha Krohn suggests: On the back of an oven-proof plate, roll the clay out to a uniform thickness (use scraps of wood or cardboard of equal thickness on either side of the clay, and roll a dowel or rolling pin along them; the clay will end up exactly the same thickness as the scraps). Then use a drinking straw (or metal tube) as a cookie cutter. Continue at * , below. | |
| Logs: Make a clay log, the same diameter as the button you want to make. Slice off disks. Continue at * , below. | |
| * Use a pin to make one hole in the button. Use that pin to hold the button in place while you make another hole with a second pin. Gently move each pin around to enlarge the holes. Repeat if you want four holes. Bake, fire, or let dry. Marsha recommends running a pin through the holes a second time while polyform clay is still warm from the oven. Glaze or paint if you like. | |
|
A few simple ideas to finish up! Use Polyform clay to create the ribbon & trim buttons. Make a single or cluster of French knots in matching or contrasting thread. Heishi beads are flat disks cut from bone or metal. Often found in Native American jewelry, these make convincing tiny buttons, even if they do have only one hole. Metal studs come in many sizes and colors. Confetti comes in great shapes and colors, just punch your own holes. Sequins, seed beads, bells, tiny satin roses, and pompoms also make fun buttons; keep your eyes open for possibilities! Start
with a full-sized button and scan it or photocopy it. Reduce it to the
right size and print on yellow paper. Paint it gold, then glue it on a
head of a thumbtack.
|
Site Map
|
Wild West |
Far Away |
& Legend |
1998 |
|